Build Your Own Stunning Solar Lights (That Actually Last Outside)
Transform your outdoor space into a sustainable, enchanting sanctuary by creating professional-grade solar lights that rival commercial alternatives. Building your own outdoor solar lighting options delivers both cost efficiency and environmental benefits while ensuring complete control over design and placement. With proper materials and assembly techniques, DIY solar lights can withstand European weather conditions for years, providing reliable illumination powered entirely by renewable energy.
This comprehensive guide merges technical precision with creative design, walking you through the exact process of constructing weather-resistant solar fixtures that meet EU safety standards. From selecting optimal photovoltaic cells to implementing proper waterproofing techniques, you’ll learn how to create professional-quality lighting solutions that complement any garden, pathway, or terrace. Whether you’re an experienced craftsperson or a first-time builder, these instructions ensure successful implementation while maintaining focus on sustainability and long-term durability.
Essential Materials and Tools
Solar Components Selection
Selecting the right components is crucial for creating efficient and long-lasting outdoor solar lights. Start with the solar panel, choosing a monocrystalline or polycrystalline panel rated between 2-5 watts for individual lights. For European climates, opt for panels with high low-light performance ratings, as they perform better during overcast conditions.
For batteries, select rechargeable NiMH (Nickel-Metal Hydride) batteries rated at 1.2V with a capacity between 600-1000mAh. These provide reliable performance and are more environmentally friendly than traditional alternatives. Alternatively, Li-ion batteries offer superior performance but require additional charging circuit protection.
When selecting LED lights, consider both brightness and energy efficiency. Choose LEDs rated between 20-50 lumens for pathway lighting or 100-200 lumens for security lighting. Warm white LEDs (2700-3000K) create inviting ambiance, while cool white LEDs (5000-6500K) provide better visibility. Ensure your LEDs are rated IP65 or higher for outdoor use in European weather conditions.
Match your components’ specifications carefully – the solar panel’s output voltage should be compatible with your battery configuration, and the LED’s power requirements should align with the system’s capacity.

Weather-Resistant Materials
When selecting materials for outdoor solar lights in European climates, durability and weather resistance are paramount. High-quality polycarbonate and ABS plastic housings offer excellent protection against UV rays, rain, and temperature fluctuations. These materials maintain their structural integrity across seasons, from winter frost to summer heat, while remaining lightweight and cost-effective.
For optimal weather resistance, look for components rated IP65 or higher, indicating complete protection against dust and water jets from any direction. Consider using marine-grade stainless steel for mounting brackets and screws, as it effectively resists corrosion in coastal areas and regions with high rainfall.
The solar panel housing should feature tempered glass with anti-reflective coating, which not only protects the photovoltaic cells but also maximises light absorption. Silicone sealants and rubber gaskets play crucial roles in weatherproofing; opt for EPDM rubber gaskets for their superior resilience to environmental stress.
For northern European locations, choose materials tested for extreme cold resistance, as standard plastics may become brittle in sub-zero temperatures. Clear UV-resistant acrylic or polycarbonate diffusers will maintain transparency longer than standard plastic alternatives, ensuring consistent light output throughout the year.
Step-by-Step Assembly Process
Preparing the Housing
Creating a weatherproof housing is crucial for ensuring your outdoor solar lights remain functional throughout all seasons. Begin by selecting high-quality plastic or glass containers that offer excellent water resistance. For optimal durability, choose materials rated IP65 or higher, which provide complete protection against dust and water jets from any direction.
Clean your chosen containers thoroughly with isopropyl alcohol to remove any residue that might affect the sealant’s adhesion. Next, drill ventilation holes at the bottom of the container to prevent condensation buildup, but ensure they’re small enough to maintain water resistance while allowing proper airflow.
For the lid or top section, create a snug fit for your solar panel by cutting an appropriately sized opening. Apply weather-resistant silicone sealant around all edges and joints, paying particular attention to areas where components intersect. When sealing, work in a clean, dry environment and allow at least 24 hours for the sealant to cure completely.
If using plastic containers, consider applying a UV-resistant coating to prevent yellowing and degradation from sun exposure. For additional weather protection, install rubber gaskets between the lid and container body. Position drain channels around the solar panel mounting area to direct water away from sensitive components.
Remember to test the housing’s water resistance before installing the electrical components by submitting it to a controlled water exposure test. This ensures your solar lights will withstand various weather conditions while maintaining their efficiency and longevity.
Solar Panel and Battery Installation
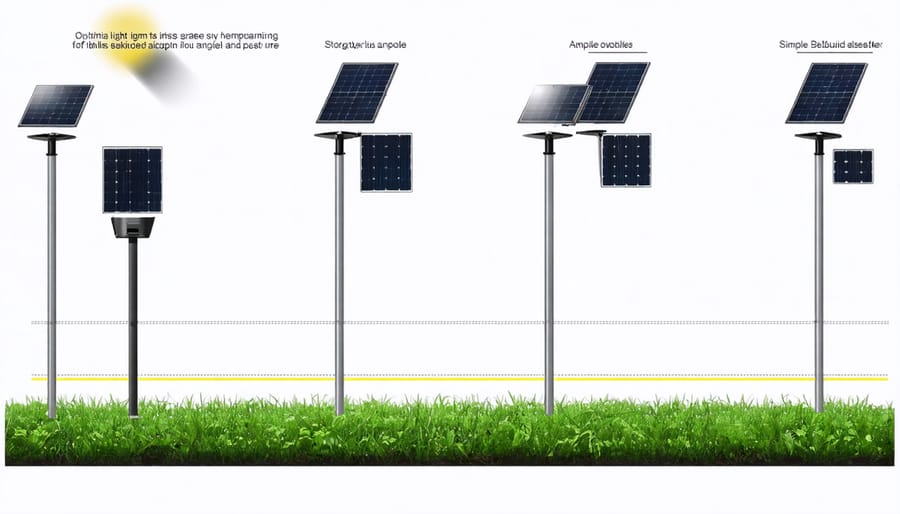
Begin by positioning your solar panel at a 45-degree angle, facing south for optimal sunlight exposure. This orientation ensures maximum energy collection throughout the day, particularly important during European winter months. Secure the panel firmly to your chosen mounting surface using weather-resistant brackets and stainless steel screws.
Connect the solar panel to the battery housing using the provided cables, ensuring proper polarity alignment – red wire to positive (+) terminal and black wire to negative (-) terminal. Most modern solar light kits include a charge controller, which should be installed between the panel and battery to prevent overcharging and extend battery life.
When installing the battery compartment, select a location that’s protected from direct exposure to rain and extreme temperatures. Use silicone sealant around cable entry points to maintain waterproof integrity. The battery housing should be mounted vertically to prevent water accumulation and ensure proper ventilation.
For optimal performance, install the provided LED indicators in a visible location. These will help monitor the system’s charging status and battery condition. Test the connections by covering the solar panel – the lights should activate automatically as darkness falls.
Remember to leave sufficient cable slack for future maintenance while keeping wires neat and secured. This prevents wind damage and ensures your installation maintains a professional appearance while meeting European safety standards.

LED Installation and Wiring
The LED installation process requires careful attention to ensure your outdoor solar lights function effectively and safely. Begin by selecting weatherproof LED units rated for outdoor use, preferably with an IP65 rating or higher for European climate conditions. Position each LED approximately 2-3 meters apart for optimal light distribution.
Start the wiring process by stripping 1 centimetre of insulation from both ends of your connecting wires using wire strippers. Connect the positive (usually red) wire from the solar panel to the positive terminal of your battery, and the negative (usually black) wire to the negative terminal. Next, connect the LED lights in parallel to ensure consistent brightness across all units.
For each LED, attach the positive wire to the longer leg (anode) and the negative wire to the shorter leg (cathode). Use heat-shrink tubing to protect each connection from moisture and corrosion. Secure all connections with waterproof wire connectors, ensuring they’re tightly sealed.
Test each connection before final installation by covering the solar panel to simulate darkness. If any lights fail to illuminate, double-check the connections. Once testing is complete, mount the LED units in their predetermined positions using weatherproof mounting brackets or clips.
For added protection, apply a small amount of silicone sealant around each connection point and mounting bracket. This extra step significantly enhances the durability of your installation in various weather conditions.
Installation and Placement Tips
Maximizing Solar Exposure
The effectiveness of your outdoor solar lights heavily depends on optimal garden lighting placement, particularly considering Europe’s varying sunlight patterns. For Northern European regions like Scandinavia, position lights at a 60-degree angle facing south to maximize exposure during shorter winter days. Central European locations benefit from a 45-degree tilt, while Mediterranean areas can utilize a shallower 30-35 degree angle.
Avoid placing solar panels under trees or near buildings that cast shadows. For best results, ensure panels receive at least 6 hours of direct sunlight daily. In regions with frequent overcast conditions, such as the UK or Netherlands, consider elevating lights slightly above ground level and using reflective surfaces nearby to enhance light capture.
Remember that seasonal adjustments may be necessary – position lights more vertically in winter and horizontally in summer to accommodate the sun’s changing path. For areas with snow, install panels high enough to prevent coverage and ensure easy access for regular cleaning.
Secure Mounting Methods
Proper mounting ensures your outdoor solar lights remain secure and functional throughout all weather conditions. For solid surfaces like concrete or wooden decking, use stainless steel screws and anchors rated for outdoor use. When mounting on walls, pre-drill holes and insert wall plugs suitable for your surface material, ensuring they can support both the light’s weight and wind resistance.
For softer ground installations, opt for robust stake designs that extend at least 20cm into the soil. Choose stakes with stabilising wings or cross-supports to prevent rotation during strong winds. In areas with sandy or loose soil, consider using concrete footings for additional stability.
For fence or post mounting, use adjustable brackets that allow for optimal solar panel positioning. Select UV-resistant cable ties or metal straps as secondary security measures. When mounting on delicate surfaces like render or vintage brickwork, use specialised adhesive mounting systems that won’t damage the surface whilst providing reliable support.
Always factor in your region’s typical wind speeds and ensure all mounting hardware meets local building regulations for outdoor installations.
Maintenance and Troubleshooting
Regular Maintenance Schedule
To maintain optimal performance of your outdoor solar lights, establish a regular maintenance routine that aligns with seasonal changes. Clean the solar panels monthly using a soft, damp cloth to remove dust, pollen, and bird droppings that can reduce charging efficiency. Avoid using harsh chemicals or abrasive materials that might scratch the panel surface.
During autumn, increase cleaning frequency to prevent fallen leaves and debris from blocking sunlight absorption. In winter, ensure panels remain free from snow and ice buildup, as these can significantly impact charging capacity. Check that drainage holes aren’t blocked to prevent water accumulation that could damage internal components.
Inspect the light fixtures every three months for signs of water ingress, particularly after heavy rainfall. Verify that all seals and gaskets remain intact and replace them if necessary. Test the automatic sensors bi-annually to confirm proper dusk-to-dawn operation.
Battery maintenance is crucial for longevity. Most solar lights use rechargeable batteries that should be replaced every 18-24 months, depending on usage patterns and weather exposure. When replacing batteries, always use the recommended type and capacity to ensure optimal performance.
Finally, check mounting brackets and fixtures annually for stability and signs of corrosion, especially in coastal areas where salt air can accelerate wear. Tighten any loose screws and apply appropriate weather-resistant coatings when needed to protect metal components.
Common Problems and Solutions
Even well-constructed outdoor solar lights can encounter issues, but most problems have straightforward solutions. If your lights aren’t performing optimally, start by checking the solar panel’s positioning. Ensure it receives direct sunlight and isn’t blocked by vegetation or debris. Regular cleaning of the panel surface with a soft, damp cloth can significantly improve charging efficiency.
When dealing with troubleshooting solar lights, dim illumination often indicates battery issues. Try performing a complete discharge-recharge cycle by covering the panel for 24 hours, then exposing it to full sunlight. Replace rechargeable batteries every 18-24 months to maintain optimal performance.
If lights fail to activate at dusk, verify that the photosensor isn’t affected by nearby artificial light sources. Repositioning the lights away from street lamps or porch lighting usually resolves this issue. For water-related problems, check that seals are intact and drainage holes aren’t blocked. Apply silicone sealant where needed to prevent moisture ingress.
Connection issues between components are another common concern. Inspect all wire connections for corrosion or looseness, cleaning contacts with isopropyl alcohol when necessary. If LEDs flicker or function intermittently, this often indicates a poor connection or moisture in the circuit. Thoroughly dry the unit and ensure all connections are secure.
Creating your own outdoor solar lights is not only a rewarding DIY project but also a significant step toward sustainable living. By following the steps outlined in this guide, you can craft beautiful, energy-efficient solar lighting solutions that enhance your outdoor spaces while minimizing environmental impact. The key to success lies in careful material selection, proper assembly, and regular maintenance of your solar lighting system.
Remember that the initial investment in quality components will pay dividends through longer-lasting, more reliable lighting solutions. By choosing weather-resistant materials and following proper installation techniques, your DIY solar lights can provide years of dependable illumination for your garden, pathways, or patio areas.
As we embrace sustainable practices across Europe, implementing solar-powered lighting solutions represents a practical way to reduce energy consumption while maintaining beautiful outdoor spaces. Whether you’re creating simple path lights or more elaborate decorative fixtures, each solar light you install contributes to a more sustainable future.
We encourage you to experiment with different designs while maintaining focus on durability and efficiency. Share your experiences with fellow enthusiasts and continue exploring innovative ways to incorporate renewable energy into your outdoor lighting setup. Together, we can illuminate our spaces while preserving our planet’s resources for future generations.
Leave a Reply